This page contains links to guides, tutorials, and tips videos and texts by reputable and skillful FTL players. The page also contains supplementary information (comparison charts and tables) and links to reverse-engineered game data.
Beginners' guides and tutorials[]
- Beginners' guide by Mike Hopley
- Kestrel A: tutorial guide (Easy) by Crow Revell (playthrough with in-depth analysis)
- Kestrel A: master class (Hard) by Crow Revell (playthrough with in-depth analysis)
- Kestrel A - Educational Run by Holoshideim (Hard, no-pause)
Ship guides[]
Each of these guides is written by a skilled player with a high win rate on Hard difficulty. Each has its own style and areas of focus.
- Crowrevell's ships guide distills each ship to a brief summary, presenting strategy in the context of the ship's weaknesses and strengths. This guide is approachable and concise, with ship strategy center-stage.
- Holoshideim's guide covers many different aspects of the game, including a section giving tips for beginners. Ship strategies are broken down into general guides for gunships and boarding ships, as well as specific guides for each ship. There's significant detail here, organized into short bullet points.
- Mike Hopley's ships guide covers ship-specific strategies and early-game tactics, including an introduction that discusses overall early strategy. This guide is the most "technical", with tips ranging from basic to extremely advanced.
Ship tier lists[]
A ship's difficulty depends on the player's skill with that ship. Difficulty also varies greatly between runs, due to the random elements in the game. Here are ship rankings by top-level players:
- Ship tier list (video with detailed discussion) by Crow Revell
- Ship tier list (Reddit post) by Neozar a.k.a. Argyle_Raccoon
Ship comparison tool[]
Click on the button below to reveal the ship data, then click on different ships to compare them.
- Layout A - The Kestrel 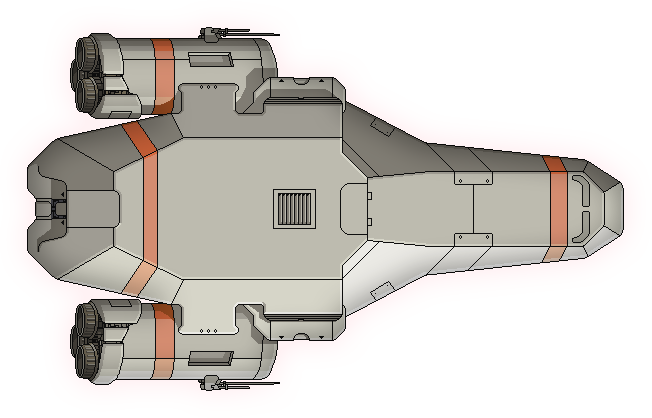 |
- 8 - |
16 |
8 |
2 |
|
|||||||||||
|---|---|---|---|---|---|---|---|---|---|---|---|---|---|---|---|---|
2 |
2 |
1 |
3 |
1 |
- |
- |
- |
- |
- |
- |
- |
1 |
1 |
1 |
- | |
Artemis, Burst Laser II |
- | |||||||||||||||
- Layout B - Red-Tail 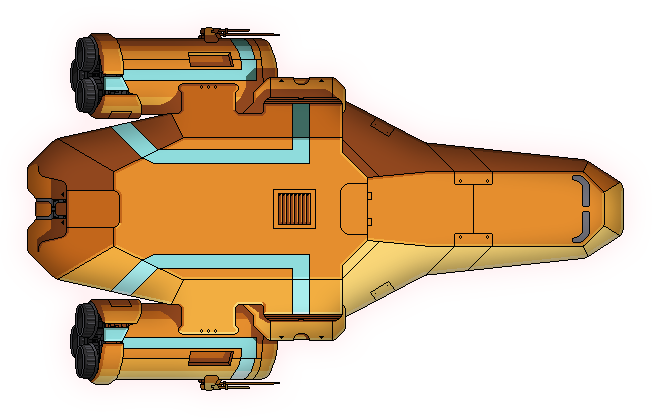 |
- 8 - |
16 |
5 |
0 |
|
|||||||||||
|---|---|---|---|---|---|---|---|---|---|---|---|---|---|---|---|---|
2 |
2 |
1 |
4 |
1 |
- |
- |
- |
- |
- |
- |
- |
1 |
1 |
1 |
- | |
Basic Laser, Basic Laser Basic Laser, Basic Laser |
- | |||||||||||||||
- Layout C - The Swallow 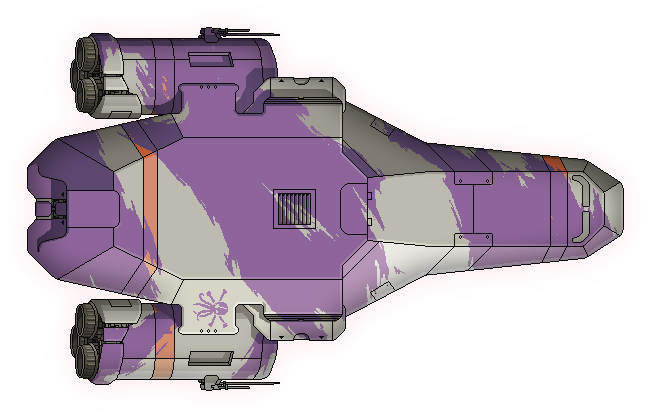 |
- 7 - |
16 |
4 |
3 |
||||||||||||
|---|---|---|---|---|---|---|---|---|---|---|---|---|---|---|---|---|
2 |
2 |
1 |
2 |
- |
1 |
- |
- |
- |
- |
- |
- |
1 |
2 |
1 |
- | |
Dual Lasers, Ion Stunner |
- | |||||||||||||||
- Layout A - The Torus  |
- 10 - |
16 |
0 |
15 |
|
|||||||||||
|---|---|---|---|---|---|---|---|---|---|---|---|---|---|---|---|---|
2 |
2 |
1 |
3 |
1 |
- |
3 |
- |
- |
- |
- |
- |
1 |
1 |
1 |
- | |
Ion Blast II |
Combat I | |||||||||||||||
- Layout B - The Vortex  |
- 9 - |
16 |
0 |
6 |
|
|||||||||||
|---|---|---|---|---|---|---|---|---|---|---|---|---|---|---|---|---|
2 |
1 |
1 |
3 |
1 |
- |
3 |
- |
- |
- |
- |
- |
1 |
- |
1 |
- | |
Heavy Ion, Heavy Laser I |
Anti-Personnel, System Repair System Repair | |||||||||||||||
- Layout C - Tetragon  |
- 9 - |
16 |
0 |
25 |
|
|||||||||||
|---|---|---|---|---|---|---|---|---|---|---|---|---|---|---|---|---|
2 |
2 |
1 |
1 |
- |
1 |
2 |
1 |
- |
- |
- |
- |
1 |
1 |
1 |
- | |
Dual Lasers |
Beam I | |||||||||||||||
Cruiser - Layout A - The Osprey  |
- 8 - |
16 |
5 |
2 |
|
|||||||||||
|---|---|---|---|---|---|---|---|---|---|---|---|---|---|---|---|---|
2 |
2 |
1 |
2 |
1 |
- |
- |
- |
- |
- |
- |
L1 |
1 |
1 |
1 |
- | |
Burst Laser II |
- | |||||||||||||||
Cruiser - Layout B - Nisos  |
- 9 - |
16 |
9 |
0 |
|
|||||||||||
|---|---|---|---|---|---|---|---|---|---|---|---|---|---|---|---|---|
2 |
2 |
1 |
2 |
1 |
- |
- |
- |
- |
- |
- |
L2 |
1 |
1 |
1 |
- | |
Dual Lasers, Leto |
- | |||||||||||||||
Cruiser - Layout C - The Fregatidae  |
- 7 - |
16 |
5 |
0 |
|
|||||||||||
|---|---|---|---|---|---|---|---|---|---|---|---|---|---|---|---|---|
2 |
2 |
1 |
1 |
- |
1 |
- |
- |
- |
1 |
- |
F1 |
1 |
1 |
1 |
- | |
- |
- | |||||||||||||||
- Layout A - The Adjudicator  |
- 5 - |
16 |
12 |
2 |
|
|||||||||||
|---|---|---|---|---|---|---|---|---|---|---|---|---|---|---|---|---|
2 |
1 |
1 |
3 |
1 |
- |
- |
- |
- |
- |
- |
- |
1 |
1 |
2 |
- | |
Halberd Beam, Leto |
- | |||||||||||||||
- Layout B - Noether  |
- 5 - |
16 |
0 |
2 |
|
|||||||||||
|---|---|---|---|---|---|---|---|---|---|---|---|---|---|---|---|---|
1 |
2 |
1 |
4 |
1 |
- |
- |
- |
- |
- |
- |
- |
1 |
1 |
1 |
- | |
Ion Blast, Ion Blast Pike Beam |
- | |||||||||||||||
- Layout C - Cerenkov  |
- 2 - |
16 |
2 |
15 |
|
|||||||||||
|---|---|---|---|---|---|---|---|---|---|---|---|---|---|---|---|---|
2 |
2 |
1 |
2 |
- |
1 |
3 |
- |
- |
- |
- |
- |
1 |
1 |
1 |
2 | |
Ion Charge |
Beam I | |||||||||||||||
- Layout A - The Gila Monster  |
- 7 - |
16 |
16 |
0 |
|
|||||||||||
|---|---|---|---|---|---|---|---|---|---|---|---|---|---|---|---|---|
2 |
2 |
1 |
1 |
1 |
- |
- |
- |
- |
1 |
- |
- |
1 |
- |
1 |
- | |
Small Bomb, Basic Laser |
- | |||||||||||||||
- Layout B - The Basilisk  |
- 11 - |
16 |
0 |
15 |
|
|||||||||||
|---|---|---|---|---|---|---|---|---|---|---|---|---|---|---|---|---|
4 |
1 |
1 |
1 |
1 |
- |
3 |
- |
- |
1 |
- |
- |
1 |
1 |
1 |
- | |
- |
Boarding, Defense I | |||||||||||||||
- Layout C - The Theseus  |
- 8 - |
16 |
20 |
0 |
|
|||||||||||
|---|---|---|---|---|---|---|---|---|---|---|---|---|---|---|---|---|
2 |
2 |
1 |
2 |
- |
2 |
- |
- |
- |
1 |
- |
- |
1 |
1 |
1 |
- | |
Lockdown Bomb, Stun Bomb |
- | |||||||||||||||
- Layout A - Man of War  |
- 8 - |
16 |
15 |
0 |
|
|||||||||||
|---|---|---|---|---|---|---|---|---|---|---|---|---|---|---|---|---|
2 |
2 |
1 |
3 |
1 |
- |
- |
- |
- |
- |
- |
- |
1 |
- |
2 |
- | |
Anti-Bio Beam, Breach Bomb I Dual Lasers |
- | |||||||||||||||
- Layout B - The Stormwalker  |
- 7 - |
16 |
25 |
0 |
|
|||||||||||
|---|---|---|---|---|---|---|---|---|---|---|---|---|---|---|---|---|
2 |
2 |
1 |
2 |
- |
- |
- |
- |
- |
1 |
- |
- |
1 |
- |
2 |
- | |
Healing Burst, Artemis |
- | |||||||||||||||
- Layout C - Ariolimax  |
- 9 - |
16 |
1 |
15 |
|
|||||||||||
|---|---|---|---|---|---|---|---|---|---|---|---|---|---|---|---|---|
2 |
2 |
1 |
2 |
- |
1 |
- |
1 |
1 |
- |
- |
- |
1 |
- |
2 |
- | |
Chain Laser |
- | |||||||||||||||
- Layout A - Bulwark  |
- 8 - |
16 |
28 |
0 |
|
|||||||||||
|---|---|---|---|---|---|---|---|---|---|---|---|---|---|---|---|---|
2 |
2 |
1 |
3 |
1 |
- |
- |
- |
- |
- |
- |
- |
1 |
1 |
1 |
- | |
Artemis, Hull Missile |
- | |||||||||||||||
- Layout B - Shivan  |
- 8 - |
16 |
18 |
0 |
|
|||||||||||
|---|---|---|---|---|---|---|---|---|---|---|---|---|---|---|---|---|
2 |
2 |
2 |
3 |
1 |
- |
- |
- |
- |
- |
- |
- |
1 |
1 |
- |
- | |
Heavy Pierce I, Fire Bomb |
- | |||||||||||||||
- Layout C - Tektite  |
- 8 - |
16 |
15 |
0 |
|
|||||||||||
|---|---|---|---|---|---|---|---|---|---|---|---|---|---|---|---|---|
2 |
2 |
1 |
3 |
- |
1 |
- |
- |
- |
- |
- |
- |
1 |
1 |
1 |
- | |
Swarm, Crystal Heavy I |
- | |||||||||||||||
- Layout A - The Nesasio  |
- 8 - |
16 |
0 |
0 |
|
Titanium System Casing | ||||||||||
|---|---|---|---|---|---|---|---|---|---|---|---|---|---|---|---|---|
- |
4 |
1 |
2 |
1 |
- |
- |
- |
- |
- |
1 |
- |
1 |
2 |
1 |
- | |
Mini Beam, Dual Lasers |
- | |||||||||||||||
- Layout B - DA-SR 12  |
- 7 - |
16 |
0 |
0 |
|
|||||||||||
|---|---|---|---|---|---|---|---|---|---|---|---|---|---|---|---|---|
- |
2 |
1 |
4 |
1 |
- |
- |
- |
- |
- |
2 |
- |
1 |
2 |
1 |
- | |
Glaive Beam |
- | |||||||||||||||
- Layout C - Simo-H  |
- 7 - |
16 |
0 |
16 |
|
|||||||||||
|---|---|---|---|---|---|---|---|---|---|---|---|---|---|---|---|---|
- |
3 |
1 |
2 |
- |
1 |
2 |
- |
- |
- |
- |
- |
1 |
- |
1 |
- | |
Charge Laser+, Mini Beam |
Shield+, Anti-Drone | |||||||||||||||
- Layout A - Kruos  |
- 8 - |
16 |
3 |
9 |
|
|||||||||||
|---|---|---|---|---|---|---|---|---|---|---|---|---|---|---|---|---|
2 |
1 |
1 |
3 |
- |
1 |
- |
1 |
- |
- |
- |
- |
1 |
1 |
1 |
- | |
Chain Laser, Ion Stunner |
- | |||||||||||||||
- Layout B - The Shrike  |
- 8 - |
16 |
0 |
0 |
|
|||||||||||
|---|---|---|---|---|---|---|---|---|---|---|---|---|---|---|---|---|
2 |
1 |
1 |
1 |
- |
1 |
- |
- |
1 |
1 |
- |
- |
1 |
- |
1 |
- | |
Advanced Flak |
- | |||||||||||||||
- Layout A - Bravais  |
- 8 - |
16 |
0 |
0 |
|
|||||||||||
|---|---|---|---|---|---|---|---|---|---|---|---|---|---|---|---|---|
2 |
2 |
1 |
3 |
1 |
- |
- |
- |
- |
- |
- |
- |
1 |
1 |
1 |
- | |
Crystal Burst I, Heavy Crystal I |
- | |||||||||||||||
- Layout B - Carnelian  |
- 8 - |
16 |
0 |
0 |
|
|||||||||||
|---|---|---|---|---|---|---|---|---|---|---|---|---|---|---|---|---|
2 |
2 |
1 |
1 |
1 |
- |
- |
- |
- |
1 |
1 |
- |
1 |
1 |
1 |
- | |
- |
- | |||||||||||||||
Ship scrap comparison[]
It's possible to calculate the total scrap value of a ship's starting equipment, although this has little practical use.
Weapons guides[]
- Weapons guide (2019) by Crow Revell
Weapons tier lists[]
- Weapons tier list (video) by Crow Revell
- Weapons tier list (spreadsheet) by Holoshideim
- Weapons tier list (image) by Neozar a.k.a. Argyle_Raccoon
- Weapons tier list (video) by RackaGack
Weapons timings and travel times[]
- Enemy weapons timing calculator by Mike Hopley
- Weapon travel times by Mike Hopley
Sector guides[]
- Sector guide (2019) by Crow Revell
- Sector tier list (2022) by Crow Revell
- Sector profit data by mekloz
Flagship guides and strategies[]
- Beginners' Flagship guide
- Boarding the Flagship without support
- Mantis C: low scrap boarding ship (for beginners) [no narrative]
- Zoltan C: Charge Ion + Ion Bomb, Heavy Laser I, Pike Beam; Hacking; 2 x Beam I Drones; Cloaking; Zoltan Shield
Community guides, tips, tutorials[]
- Crow Revell's
- Playthroughs with in-depth analysis:
- Crew kill tactics w/out boarding
- How to use scrap in FTL
- How to not lose in FTL
- Augment tier list
- Mike Hopley's Guides and tips
- Guides:
- Ship-specific tips:
- Fixing O2 (Zoltan C, Slug C, Mantis B)
- Heavy pierce with hacking (Rock B)
- Forced double boarding (Fed Cruiser C)
- System- and situation-specific tips:
- Zoltan ion shielding
- Zoltan Shield piercing: part 1, part 2, part 3
- MC optimisation: part 1, part 2
- Split hack
- Shield drones: part 1, part 2
- Defence vs Combat Drone + Heavy Laser I (+ Mini Beam)
- Defence drone optimisation
- Offensive drone micro
- Controlling system repair drones
- Pulsars
- Cloning at pulsars: part 1, part 2
- Tips & tricks by Dark Twinge
- 'Calculated FTL' (tips covering different aspects of the game, with in-depth info) by HeXaGoN
- FTL guides (beginner tips, general ship guides, ship-specific guides) spreadsheet by Holoshideim
- 'Hidden strategies' by VolusFM_
- 'Practical FTL' by Zephyr
- Crew drones parking by Masala-
- Drone targeting glitch (visualisation) by slowriderxcorps
- Fires spread and extinguishing data by TheSwiftTiger and Mike Hopley
- Getting through 2 shield barriers with Engi B starting weapons by mekloz
- Hard mode AI targeting mechanics by Threarah (officially confirmed by the devs thanks to chewbacca77 and slowriderxcorps)
Reverse-engineered game data[]
- Reverse-engineered documentation collection by ZNixian321 a.k.a. Campbell Suter (ZNix)
Introduction and tribute to the game[]
Introduction to the game[]
- "FTL Iceberg Explained" by empowers67
Tribute to the game[]
- "10 years of FTL" by ThomasPettersson
In-game tips[]
When launching the game for the first time on PC, you will see: "Open the in-game menu by pressing ESCAPE. You can restart or change options from there."
- Asteroids
- Fighting in asteroid fields is dangerous, but use it to your advantage. Take out enemy Shields and let the rocks take care of the rest.
- Augmentations
- Your ship can only hold 3 augmentations. They provide unique benefits to a system, the crew or the entire ship.
- Autofire
- Autofire will let a weapon maintain its target. Just keep an eye on your missile count!
- Beams
- Beam weapons do damage based on the number of rooms they hit. Each Shield bubble will block 1 damage of a beam; it's best to use beams when the enemy's shields are down.
- Boarding
- If you're having trouble with boarders, fight within the medbay. If all else fails, vent the rest of the oxygen out of the ship!
- Bomb Weapons
- Bombs teleport directly onto either ship. They bypass Shields AND Defense Drones. However, they affect only crew and Systems; they do no damage to the ship's hull.
- Breaches
- If a room with a breach has no Oxygen, try opening all the doors surrounding it to make it less hazardous.
- Choices
- Results of most choices have multiple outcomes. You can never be sure what will happen.
- Cloaking
- Cloaking prevents enemies from firing on your ship or charging their weapons. It also increases your base evasion by 60.
- Death
- Remember, losing is part of the fun! ... No, I'm serious...
- Door Subsystem
- Upgrading your doors will greatly reduce the chance of fire spreading between rooms and will significantly slow boarder movement.
- Drones
- If you're struggling against enemy Drones, target the Drone System to temporarily disable them.
- Exits
- It's tempting to rush for the sector exits, but exploring is the only way to upgrade your ship. Try and get as much out of each sector as possible.
- Evasion
- Evading enemy shots is crucial, but it requires functioning engines AND a pilot. Having someone man the engines will increase your evasion as well.
- Fire
- If fire is spreading, consider opening airlocks and doors to vent the oxygen from parts of your ship. Fire is quickly extinguished without O2.
- Font Size
- Pressing +/- (customizable in options) will let you change the event text size.
- Fuel
- Every jump consumes one unit of fuel, so keep an eye on your reserves. Buy fuel at stores to avoid being left stranded.
- Grinding Sectors
- It can be beneficial to stay in a Sector for as long as possible to improve the ship since each Sector is increasingly difficult.
- Health
- Pay attention to your crew's health! Use the Medbay to keep them patched up.
- Hidden Choices
- When you see a blue colored choice in an event, it's a special option that has been made available by your current equipment.
- Hotkeys
- You can charge or arm weapons using number hotkeys: The Weapon Slots are 1-4 on your keyboard, and the Drones are 5-7 (customizeable in the options).
- Ion Weapons
- Ion weapons de-power and lock a System for a time. If they hit the enemy shields they deal their stun damage directly to the Shields System.
- Nebulas
- Passing through a Nebula will allow you to temporarily slow down the fleet advancement but they contain their own unique dangers.
- Oxygen
- If the ship's room color changes from tan to red, it means you're losing oxygen. Crew will be damaged and fires will burn out in rooms with red hazard stripes.
- Pausing
- Press SPACE at any time to pause the game. You can still issue orders to crew or manipulate system power while paused.
- Power Bars
- Upgraded systems can be helpful even if you don't have enough reactor power to use them; they still absorb one damage.
- Rebel Fleet
- The Rebel fleet (represented by the red circle on the map) moves closer to your position every time you jump. Certain events can slow or speed up their movement.
- Score
- Your score is based on how many ships you defeat, the number of beacons explored, and your total scrap collection.
- Selling
- Weapons, Drones and Augments can be sold for 1/2 the purchasing price at stores. Click on the SELL tab at the top.
- Sensors
- If the ship goes dark, don't panic. Just fix the Sensors Subsystem.
- Shield Piercing
- Missiles ignore shields. Use missiles to damage a powerful ship's Shields System. Just remember that Defense Drones can shoot down missiles!
- Sound
- Go into the options menu to turn on or off the sound effects and music.
- Solar Flares
- Solar flares will cause hull damage in addition to starting fires. Make sure your shields are up to help mitigate this effect.
- System Damage
- When a System fully breaks due to fire or boarders, the hull also takes one damage.
- Targets
- Prioritize your targeting in combat. Weapons and Shields are usually the best choice, but if they're fleeing, hit their Engines or Piloting to prevent escape.
- Upgrades
- Don't forget to upgrade your ship! Often shields are the highest priority, but don't underestimate the usefulness of subsystems.
- Weapons
- You can queue up an attack before the weapon is charged. It will fire when it's charged.
- Weapon Order
- Rearrange a Weapon or Drone schematic by dragging it into the desired position. The left-most slot will be the last to power down if the system is damaged.
- Beams
- For every shield bar on the enemy, a beam's damage is reduced by one. For example, a three damage beam against two shield bars will cause one damage in every room it hits.
- Bombs
- Bombs teleport past shields and defense drones to land directly on the ship. Like missiles, they cost one missile to launch. They never damage hull, but can be effective at disrupting crew and systems. You can even launch them at boarders on your own ship.
- Chain Ion
- The Chain Ion increases its damage every time it fires. Check the green lights on the weapon to see how many times it has fired.
- Chain lasers
- Chain lasers decrease their cooldown every time they fire. Check the green lights on the weapon to see how many times it has fired.
- Charge weapons
- Charge weapons can be charged multiple times to generate more firepower. You can save time and fire the weapon prematurely but it will have fewer shots ready as a result.
- Crystal weapons
- Crystal weapons pierce a single layer of shields. Only level 2 shields and higher can stop them.
- Drones
- Use requires spending one drone part to activate, and then constant power (similar to weapons).
- Flak weapons
- Flak weapons target an area instead of a single room.
- Heal Bomb
- Remember, bombs can miss the enemy ship so don't count on this as a guaranteed heal for your boarders!
- Hull weapons
- Hull weapons deal double damage if they hit a room that does not have a system or a subsystem.
- Ion damage
- For every one point of ion damage, one power bar is removed from the target system and it is then locked for 5 seconds, preventing re-powering. If an ion weapon hits shields, the damage is automatically applied to the Shield System.
- Laser
- Each laser shot will be blocked by a single shield bubble, regardless of the laser's damage.
- Missiles
- Missiles will ignore all enemy shields, but cost one missile to launch. Enemy defense drones will shoot down incoming missiles.
- Repair Bomb
- Bombs never miss when targeting your own ship, so this bomb is a guaranteed full heal for any of your systems.
See also[]
Guides (work in progress)[]
Crew[]
Weapons[]
Enemy ships[]
Events[]
Environmental hazards[]
- Environmental hazard events (table)
- Solar Flare effects (table) + Solar Flare impact examples
- Pulsar ion damage (table)
Stores[]
Store assortment[]
- Hull repairs in stores (table)
- Resources in stores (table)
- Purchasable systems (table)
- Purchasable weapons (table)
- Purchasable drones (table)
- Purchasable augmentations (table)